THANK YOU FOR PURCHASING YOUR TIMEX
®
WATCH.
EXTENDED WARRANTY
Available in U.S. only. Extend your warranty for an additional 4 years from date of purchase for $5. You can
pay with AMEX, Discover, Visa or MasterCard by calling 1 800-448-4639 during normal business hours. Payment
must be made within 30 days of purchase. Name, address, telephone number, purchase date, and 5-digit model
number required. You can also mail a check for $5 to: Timex Extended Warranty, P.O. Box 1676, Dept. EF, Little
Rock, AR 72203.
Please read instructions carefully to understand how to operate your Timex
®
watch.
Visit www.timex.com/manuals to download a full and detailed user manual.
TIMEX
®
IRONMAN
®
SLEEK
™
250-LAP QUICK START
FEWER DISTRACTIONS FOR BETTER WORKOUTS
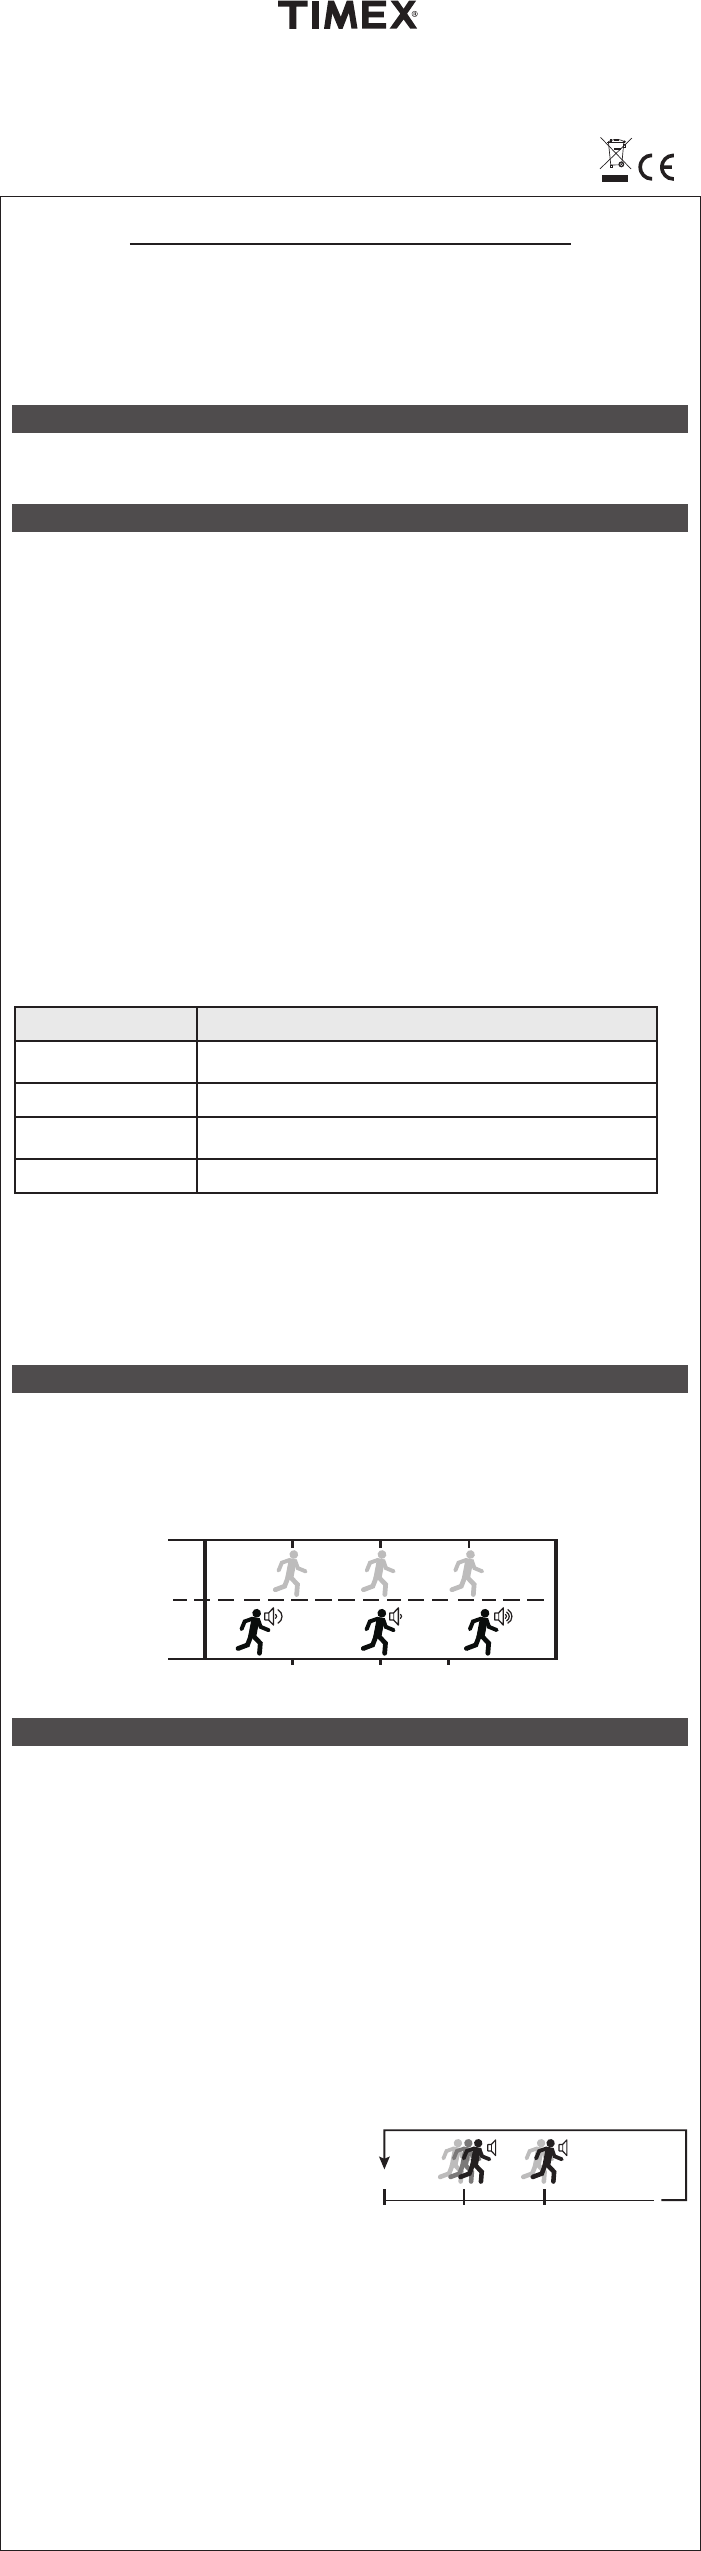
Preserve momentum and avoid breaking your stride. Use the TapScreen technology to take a lap/split without
having to slow down or take your eyes off the road. You can set the SLEEK
™
250-Lap Watch with your target
pace and audible distinct alerts will let you know when to speed up or slow down to stay on pace.
GETTING STARTED
Set up the SLEEK
™
250 watch with your goals and personal settings.
BUTTON FUNCTIONS
Use the buttons on the watch to set preferences and time workouts.
INDIGLO
®
night-light or button
Press to turn on night-light, or hold to activate Night-Mode
®
feature.
START/SPLIT/+
Start a workout or timer, take a lap/split, or increase values in settings screens.
MODE
Cycle through the watch modes, or move to the next field in settings screens.
STOP/RESET/SET
Stop a running workout or timer, reset a stopped time, or enter and exit settings screens.
TAPSCREEN
™
TECHNOLOGY
When enabled, start a workout or timer, take a lap/split in Chrono mode, or stop an interval timer or timer.
DISPLAY/TAP ON-OFF/-
Scroll through data during a workout, decrease values in settings screens, or enable the TapScreen
™
feature
before a workout.
SETTING THE TIME AND DATE
Set the time, date, and the format in which time and date display.
1. Hold SET until SET TIME displays.
2. Press START/SPLIT/+ and DISPLAY/TAP ON-OFF/- to choose the time zone to set.
3. Press MODE.
4. Continue pressing START/SPLIT/+, DISPLAY/TAP ON-OFF/-, and MODE to set time, date, time format,
and date format.
5. Press SET to exit.
SETTING YOUR TARGET PACE
Set your goal for workouts in minutes per mile/km.
SETTING FUNCTION
Target pace
(TARGET PACE) The number of minutes in which you want to complete each mile or kilometer.
Maximum target range
(TARGET RANGE +)
The time by which your pace may exceed your target and still be considered
ON TARGET.
Minimum target range
(TARGET RANGE -)
The time by which your pace may fall short of your target and still be considered
ON TARGET.
Target distance
(TARGET DIST)
The distance you want to cover during a workout (optional).
1. Press MODE until SETUP displays.
2. Pres START/SPLIT/+ until TARGET TIME displays.
3. Press SET.
4. Press START/SPLIT/+ and DISPLAY/TAP ON-OFF/- to select ON.
5. Continue pressing MODE, START/SPLIT/+, and DISPLAY/TAP ON-OFF/- to set target pace, target range,
and target distance.
6. Press SET to exit.
Your total time (target pace multiplied by target distance) displays.
CHRONO ON THE GO
Use Chrono mode to track your lap, split and delta times to train more efficiently.
To start the chrono just tap the watch face. To take a lap/split, tap again and your data will be displayed for five
seconds meanwhile the chronograph continues running. Press stop to stop the workout and press again to find
the options to save or erase.
If your target pacer is on, when you take a split the watch compares your current pace with your target pace
and distinct alerts will advise to adjust or keep the running pace. Slow beeps indicate you’re behind pace, a
single beep lets you know you’re on pace, and fast beeps indicate you’re ahead. An onscreen message tells you
just how far ahead or behind you are.
TARGET
8’ LAP/
START
ACTUAL
LAP 1/MILE 1
10’00
-2’00 (slow)
LAP 3/MILE 3
7’00
+1’00
(fast)
LAP 2/MILE 2
8’00
(on
time)
FINISH
(on pace)
(fast)
(slow)
MILE
INTERVAL TRAINING
Use the Interval Timer mode to help you keep track of complex interval workouts.
DESIGNING YOUR INTERVAL WORKOUT TO SUIT YOUR NEEDS
You can set up 2 separate interval workouts, each with up to 8 intervals. Each interval can time up to 24 hours,
and you can choose a name for each interval to help you know what activity you should be performing.
You can set up your interval workouts to repeat when a set of intervals is complete, expanding the complexity
of workouts the watch can manage for you. The watch keeps track of repetitions for you, and with customizable
names for the intervals you always know how intense your run should be at a given time.
1. Press MODE until INT TIMER displays.
2. Press SET.
3. Press START/SPLIT/+ and DISPLAY/TAP ON-OFF/- to select the workout to set up, and then press MODE.
4. Press START/SPLIT/+ and DISPLAY/TAP ON-OFF/- to set number of times to repeat the intervals, and then
press MODE to begin setting up intervals.
5. Press START/SPLIT/+ and DISPLAY/TAP ON-OFF/- to choose a name for the interval, and then press MODE.
6. Press START/SPLIT/+, DISPLAY/TAP ON-OFF/-, and MODE to set the time for the interval.
7. If you want to set up an additional interval, press MODE until the interval number at the top of the
display flashes, press START/SPLIT/+ to select the next interval, and then press MODE to begin
setting the time.
NOTE: You can also select an interval you already configured if you need to make changes.
8. Repeat steps 5 through 7 until all intervals are set. You can set up to 8 intervals for each workout.
9. Press STOP/RESET/SET.
Follow these steps to time an interval workout.
1. Press MODE until INT TIMER displays.
2. Press START.
3. When one interval ends, an alert sounds prompting
you to begin the next interval. The name and time for
the new interval display.
4. Press STOP to stop the workout.
5. Press RESET when workout is stopped to select SAVE
or ERASE.
6. Hold RESET to reset the chronometer and save or erase the workout data.
If you selected SAVE in step 5, all workout data is saved. If you selected ERASE in step 5, the workout is erased
but not saved.
MERCI D’AVOIR ACHETÉ VOTRE MONTRE TIMEX
®
.
GARANTIE ÉTENDUE
Proposée aux États-Unis seulement. La garantie peut être prolongée pour une période additionnelle de
4 ans à compter de la date d’achat pour la somme de 5 $. Vous pouvez effectuer ce paiement avec AMEX,
Discover, Visa ou MasterCard en composant le 1-800-448-4639 durant les heures normales d’ouverture.
Le paiement doit être effectué dans les 30 jours qui suivent l’achat. Indiquer les nom, adresse, numéro de
téléphone, date d’achat et numéro de modèle à 5 chiffres. Il est également possible d’envoyer un chèque
de 5 $ US par courrier à : Timex Extended Warranty, P.O. Box 1676, Dept. EF, Little Rock, AR 72203.
Lire les instructions attentivement pour bien comprendre le fonctionnement de cette montre Timex
®
.
Consultez le site www.timex.com/manuals pour télécharger un manuel d’utilisateur complet
et détaillé.
GUIDE DE DÉMARRAGE RAPIDE TIMEX
®
IRONMAN
®
SLEEK
™
250-LAP
MOINS DE DISTRACTIONS POUR DE MEILLEURES SÉANCES D’EXERCICE
Préservez votre élan et votre foulée. Utilisez la technologie TapScreen pour prendre un tour/temps intermédiaire
sans avoir à ralentir ni avoir besoin de quitter les yeux de la route. Il est possible de régler la montre SLEEK
™
250-Lap avec l’allure cible et donner des alarmes sonores distinctes pour indiquer quand accélérer ou ralentir
pour rester à l’allure souhaitée.
MISE EN MARCHE
Configurez la montre SLEEK
™
250 avec vos paramètres et objectifs personnels.
FONCTIONS DES BOUTONS
Utilisez les boutons de la montre pour configurer les préférences et chronométrer les séances d’exercice.
Veilleuse INDIGLO
®
ou Bouton
Appuyez pour allumer la veilleuse ou maintenez pour activer la fonction Night-Mode
®
.
START/SPLIT/+Démarrez une séance d’exercice ou la minuterie, prenez un tour/temps intermédiaire ou
augmentez les valeurs dans les écrans de paramètres.
MODE
Faites défiler les modes de la montre ou passez au champ suivant dans les écrans de paramètres.
STOP/RESET/SET
Arrêtez une séance d’exercice ou une minuterie en cours, réinitialisez un temps arrêté ou entrez dans et quittez
les écrans de paramètres.
TECHNOLOGIE TAPSCREEN
™
Quand activé, démarrez une séance d’exercice ou une minuterie, prenez un tour/temps intermédiaire en mode
Chrono ou arrêtez une minuterie par intervalles ou une minuterie.
DISPLAY/TAP ON-OFF/-
Faites défiler les données pendant une séance d’exercice, diminuez des valeurs dans les écrans de paramètres,
ou activez/désactivez la fonction TapScreen
™
avant une séance d’exercice.
RÉGLAGE DE L’HEURE ET DE LA DATE
Réglez l’heure, la date et le format auxquels l’heure et la date s’affichent.
1. Maintenez SET jusqu’à affichage de SET TIME.
2. Appuyez sur START/SPLIT/+ et DISPLAY/TAP ON-OFF/- pour choisir le fuseau horaire à régler.
3. Appuyez sur MODE.
4. Continuez à appuyer sur START/SPLIT/+, DISPLAY/TAP ON-OFF/- et MODE pour régler l’heure, la date,
le format d’heure et le format de date.
5. Appuyez sur SET pour quitter.
RÉGLAGE DE VOTRE ALLURE CIBLE
Réglez votre objectif pour les séances d’exercice en minutes par mile/km.
PARAMÈTRE FONCTION
Allure cible (ALLURE CIBLE) Le nombre de minutes dans lequel vous souhaitez terminer chaque mile ou kilomètre.
Plage cible maximum
(TARGET RANGE +)
Le temps auquel votre allure peut excéder votre cible et toujours être considérée SUR
CIBLE.
Plage cible minimum
(TARGET RANGE -)
Le temps auquel votre allure peut être inférieure à votre cible et toujours être
considérée SUR CIBLE.
Distance cible
(TARGET DIST/DIST CIBLE)
La distance que vous souhaitez couvrir pendant une séance d'exercice (en option).
1. Appuyez sur MODE jusqu’à affichage de SETUP [Configuration].
2. Appuyez sur START/SPLIT/+ jusqu’à affichage de TARGET TIME [TEMPS CIBLE].
3. Appuyez sur SET (RÉGLER).
4. Appuyez sur START/SPLIT/+ et DISPLAY/TAP ON-OFF/- pour sélectionner ON.
5. Continuez à appuyer sur MODE, START/SPLIT/+ et DISPLAY/TAP ON-OFF/- pour régler l’allure cible, la plage
cible et la distance cible.
6. Appuyez sur SET pour quitter.
Votre temps total (allure cible multipliée par distance cible) s’affiche.
CHRONO INSTANTANÉ
Utilisez le mode Chrono pour suivre vos temps au tour, intermédiaire et delta pour vous entraîner plus
efficacement.
Pour démarrer le chrono, tapez sur le cadran de la montre. Pour marquer un temps au tour/intermédiaire,
tapez à nouveau et vos données s’afficheront durant 5 secondes, pendant ce temps le chronographe reste en
marche. Appuyer sur stop pour arrêter la séance et appuyez à nouveau pour trouver les options de sauvegarde
ou d’effacement.
Si votre moniteur d’allure est activé, lorsque vous prenez un temps intermédiaire, la montre compare votre
allure actuelle avec votre allure cible, et des alertes distinctes vous conseilleront d’ajuster ou de maintenir
l’allure de course. Les bips lents indiquent que vous êtes en-deçà de votre allure cible, un simple bip vous
laisse savoir que vous allez à la bonne allure et un bip rapide lorsque vous êtes au-delà de votre allure cible.
Un message à l’écran vous indique de combien vous êtes en-deçà ou au-delà de votre allure.
CIBLE
8’ TOUR/
MILE
RÉEL
TOUR 1/MILE 1
10’00
-2’00 (lent)
(bonne allure)
(lent)
TOUR 2/MILE 2
8’00
(à temps)
TOUR 3/MILE 3
7’00
+1’00 (rapide)
TERMINER
(rapide)
DÉMARRER
EXERCICE PAR INTERVALLES
Utilisez le mode Minuterie par intervalles pour vous permettre de suivre vos séances d’exercice à intervalles
complexes.
CONCEPTION DE VOTRE SÉANCE D’EXERCICE À INTERVALLES POUR CONVENIR À VOS BESOINS
Vous pouvez configurer jusqu’à 2 séances d’exercice à intervalles séparées, chacune avec un maximum de
8 intervalles. Chaque intervalle peut mesurer jusqu’à 24 heures et vous pouvez choisir un nom pour chaque
intervalle pour vous permettre de savoir quelle activité vous devriez effectuer.
Vous pouvez configurer vos séances d’exercice à intervalles à répéter lorsqu’une série d’intervalles est terminée,
élargissant la complexité des séances d’exercice que la montre peut gérer pour vous. La montre effectue un
suivi des répétitions pour vous et, avec des noms personnalisables pour les intervalles, vous connaissez toujours
l’intensité de votre course à tout moment.
1. Appuyez sur MODE jusqu’à affichage de INT TIMER (minuterie par intervalles).
2. Appuyez sur SET (RÉGLER).
3. Appuyez sur START/SPLIT/+ et DISPLAY/TAP ON-OFF/- pour sélectionner la séance d’exercice à configurer,
puis appuyez sur MODE.
4. Appuyez sur START/SPLIT/+ et DISPLAY/TAP ON-OFF/- pour sélectionner le nombre de fois à répéter les
intervalles, puis appuyez sur MODE pour conserver à configurer les intervalles.
5. Appuyez sur START/SPLIT/+ et DISPLAY/TAP ON-OFF/- pour choisir un nom pour l’intervalle, puis appuyez
sur MODE.
6. Appuyez sur START/SPLIT/+, DISPLAY/TAP ON-OFF/- et MODE pour régler le temps pour l’intervalle.
7. Si vous souhaitez configurer un intervalle additionnel, appuyez sur MODE jusqu’à ce que le nombre
d’intervalles clignote en haut de l’affichage, appuyez sur START/SPLIT/+ pour sélectionner l’intervalle suivant
puis appuyez sur MODE pour commencer à régler le temps.
REMARQUE : Vous pouvez également sélectionner un intervalle que vous avez déjà configuré si vous
devez effectuer des modifications.
8. Répétez les étapes 5 et 7 jusqu’à ce que tous les intervalles soient réglés. Vous pouvez configurer jusqu’à
8 intervalles pour chaque séance d’exercice.
9. Appuyez sur STOP/RESET/SET.
Suivez ces étapes pour chronométrer une séance d’exercice à intervalles.
1. Appuyez sur MODE jusqu’à affichage de INT TIMER
(minuterie par intervalles).
2. Appuyer sur START.
3. Lorsqu’un intervalle se termine, un alerte retentit
vous invitant à commencer l’intervalle suivant. Le
nom et le temps pour le nouvel intervalle s’affichent.
4. Appuyez sur STOP pour arrêter la séance d’exercice.
5. Appuyez sur RESET lorsque la séance d’exercice est arrêtée pour sélectionner SAVE [SAUVEGARDER] ou
ERASE [EFFACER].
GRACIAS POR LA COMPRA DE SU RELOJ TIMEX
®
.
GARANTÍA EXTENDIDA
Disponible solamente en EUA. Extienda su garantía por 4 años más a partir de la fecha de compra por $5. Puede
pagar con AMEX, Discover, Visa o MasterCard llamando al 1 800-448-4639 en horas normales de oficina. El pago
deberá efectuarse dentro de los 30 días siguientes a la fecha de compra. Indique el nombre, dirección, número
de teléfono, fecha de compra y número de modelo (5 dígitos). También puede enviar un cheque de $5 por
correo a: Timex Extended Warranty, P.O. Box 1676, Dept. EF, Little Rock, AR 72203.
Por favor lea atentamente las instrucciones para saber cómo funciona su reloj Timex
®
.
Visite www.timex.com/manuals para descargar el manual del usuario completo y detallado.
GUÍA RÁPIDA DEL RELOJ TIMEX
®
IRONMAN
®
SLEEK
™
250-LAP
POCAS DISTRACCIONES PARA MEJORES EJERCICIOS
Conserve el impulso y evite interrumpir el ritmo. Use la tecnología TapScreen para tomar una vuelta o fracción
sin tener que frenar o perder de vista la carretera. Puede programar el reloj SLEEK™ de 250 vueltas con su ritmo
previsto y alertas sonoras diferenciadas le avisarán cuándo acelerar o frenar para mantener el paso.
PARA INICIAR
Ajuste el reloj SLEEK
™
250 a su configuración y metas personales.
FUNCIONES DE LOS BOTONES
Use los botones del reloj para establecer preferencias y ejercicios de tiempo.
Luz nocturna o botón INDIGLO
®
Pulse para activar la luz nocturna o mantenga para activar la función Night-Mode
®
.
START/SPLIT/+ (inicio/sección/+)
Inicie un ejercicio o un temporizador, tome una vuelta/sección o aumente los valores en las pantallas de
configuración.
MODE (modo)
Recorra los modos del reloj, o cambie al siguiente campo en las pantallas de configuraciones.
STOP/RESET/SET (parar/reiniciar/fijar)
Detenga un ejercicio o un temporizador en curso, reinicie un temporizador detenido o ingrese y salga de las
pantallas de configuración.
TECNOLOGÍA TAPSCREEN
™
Cuando está activada, inicia un ejercicio o un temporizador, toma una vuelta/sección o detiene un temporizador
o temporizador de intervalo.
DISPLAY/TAP ON-OFF/- (pantalla/encender apagar tap/-)
Recorre los datos durante un ejercicio, disminuye los valores en las pantallas de ajustes o activa la herramienta
TapScreen
™
antes de un ejercicio.
CONFIGURACIÓN DE HORA Y FECHA
Ajuste la hora, fecha y el formato en que aparecen.
1. Pulse y mantenga SET hasta que aparezca SET TIME.
2. Pulse START/SPLIT/+ y DISPLAY/TAP ON-OFF/- para elegir el huso horario que se ajusta.
3. Pulse MODE.
4. Siga pulsando START/SPLIT/+, DISPLAY/TAP ON-OFF/- y MODE para ajustar la hora, fecha, formato de hora
y formato de fecha.
5. Pulse SET para salir.
CONFIGURACIÓN DE SU PASO META
Establezca su meta para ejercicios en minutos por milla/km.
CONFIGURACIÓN FUNCIÓN
Paso deseado
(TARGET PACE) El número de minutos en los que desea completar cada milla o kilómetro.
Intervalo máximo de la meta
(TARGET RANGE +)
El tiempo en que su paso puede superar el deseado y aún considerarse ON TARGET
(en la meta).
Intervalo mínimo de la meta
(TARGET RANGE -)
El tiempo en que su paso puede estar por debajo del deseado y aún considerarse ON
TARGET (en la meta).
Distancia deseada
(TARGET DIST)
La distancia que desea cubrir durante un ejercicio (opcional).
1. Pulse MODE hasta que aparezca SETUP.
2. Pulse START/SPLIT/+ hasta que aparezca TARGET TIME (tiempo deseado).
3. Pulse SET.
4. Pulse START/SPLIT/+ y DISPLAY/TAP ON-OFF/- para elegir ON (encendido).
5. Siga pulsando MODE, START/SPLIT/+ y DISPLAY/TAP ON-OFF/- para ajustar el paso deseado, el intervalo
de la meta y la distancia deseada.
6. Pulse SET para salir.
Aparece su tiempo total (paso deseado multiplicado por la distancia deseada).
CRONÓGRAFO EN MARCHA
Use el modo cronógrafo para seguir los tiempos de vuelta, intervalo y delta y entrenarse con más eficiencia.
Para iniciar el cronógrafo sólo toque la cara del reloj. Para tomar una vuelta o fracción, toque de nuevo y la
información aparecerá durante cinco segundos mientras el cronógrafo sigue andando. Pulse stop para detener
el ejercicio y pulse de nuevo para encontrar las opciones de guardar o borrar.
Si su marcador de paso está activado, cuando toma una fracción el reloj compara su paso actual con su paso
previsto y alertas diferenciadas le avisarán para ajustar o mantener el ritmo de carrera. Unos pitidos lentos le
indican que está por debajo del paso, un único pitido le indica que está en el paso y los pitidos rápidos le dicen
que ha superado el paso. Un mensaje en la pantalla le dice qué tan por delante o por detrás está su paso.
META
8'
VUELTA/
MILLA
REAL
VUELTA 1/MILLA 1
10’00
-2’00 (lento)
(a tiempo)
(lento)
VUELTA 2/MILLA 2
8’00
(a tiempo)
VUELTA 3/MILLA 3
7’00
+1’00 (rápido)
FINAL
(rápido)
INICIO
ENTRENAMIENTO POR INTERVALOS
Use el modo temporizador de intervalos para ayudarlo a registrar ejercicios con intervalos complejos.
DISEÑE SU EJERCICIO POR INTERVALOS SEGÚN SUS NECESIDADES
Se pueden programar hasta 2 ejercicios por intervalos separados, con hasta 8 intervalos cada uno. Cada
intervalo puede tener un tiempo de hasta 24 horas, y usted puede elegir un nombre para cada intervalo para
ayudarlo a saber qué actividad debería estar realizando.
Usted puede configurar sus ejercicios por intervalos para que se repitan cuando se complete un conjunto
establecido de intervalos, lo que expande la complejidad de los ejercicios que el reloj puede administrar para
usted. El reloj registra las repeticiones para usted y con los nombres personalizables de los intervalos usted
siempre sabe qué tan intensa debe ser su carrera en cualquier momento.
1. Pulse MODE hasta que aparezca INT TIMER.
2. Pulse SET.
3. Pulse START/SPLIT/+ y DISPLAY/TAP ON-OFF/- para seleccionar el ejercicio a configurar y luego pulse MODE.
4. Pulse START/SPLIT/+ y DISPLAY/TAP ON-OFF/- para fijar el número de veces que se repetirán los intervalos
y luego pulse MODE para comenzar a ajustar los intervalos.
5. Pulse START/SPLIT/+ y DISPLAY/TAP ON-OFF/- para elegir un nombre para el intervalo y luego pulse MODE.
6. Pulse START/SPLIT/+, DISPLAY/TAP ON-OFF/- y MODE para establecer el tiempo del intervalo.
7. Si desea fijar un intervalo adicional, pulse MODE hasta que el número de intervalo en la parte superior de
la pantalla centellee, pulse START/SPLIT/+ para seleccionar el siguiente intervalo y luego pulse MODE para
comenzar a ajustar el tiempo.
NOTA: Usted también puede seleccionar un intervalo que ya haya configurado si necesita hacer cambios.
8. Repita los pasos 5 a 7 hasta que todos los intervalos estén ajustados. Usted puede programar hasta
8 intervalos para cada ejercicio.
9. Pulse STOP/RESET/SET.
Siga estos pasos para tomar el tiempo de un ejercicio por intervalos.
1. Pulse MODE hasta que aparezca INT TIMER.
2. Pulse START.
3. Cuando termina uno de los intervalos, suena
una alerta para que usted comience el siguiente
intervalo. Aparecen el nombre y el tiempo
del siguiente intervalo.
4. Pulse STOP para detener el ejercicio.
5. Pulse RESET cuando el ejercicio esté detenido para seleccionar SAVE o ERASE (guardar o borrar).
6. Pulse y mantenga RESET para reiniciar el cronómetro y guardar o borrar los datos del ejercicio.
Si seleccionó SAVE en el paso 5, se guardan todos los datos del ejercicio. Si seleccionó ERASE en el paso 5,
todos los datos del ejercicio se borran y no se guardan.
(continued on reverse) (suite au dos) (sigue al dorso)
Register your product at
www.timex.com
W279 661-095003 US
Enregistrez votre produit à
www.timex.com
W279 661-095003 US
Registre su producto en
www.timex.com
W279 661-095003 US
Printed in the Phillipines
START INT 1 INT 2
(X6)
(fast 7:45) (slow 1:00)
DÉMARRER
(X6)
INT 1
(rapide 7:45)
INT 2
(lent 1:00)
INICIO
(X6)
INT 1
(rápido 7:45)
INT 2
(lento 1:00)


 (43 pages)


 Manymanuals.com
 Manymanuals.de
 Manymanuals.fr
 Manymanuals.it
 Manymanuals.pl
 Manymanuals.cz
 Manymanuals.es
 Manymanuals-pt.com
Comments to this Manuals